
How to Turn Your BTO Model into a Photorealistic Dream with AI!
How to Turn Your BTO Model into a Photorealistic Dream with AI!

Hey BTO planners!
Thank you to everyone who has already purchased one of our models and is looking for new ways to get creative. For those of you who haven’t bought a model yet, feel free to read this guide—it might just be the nudge you need!
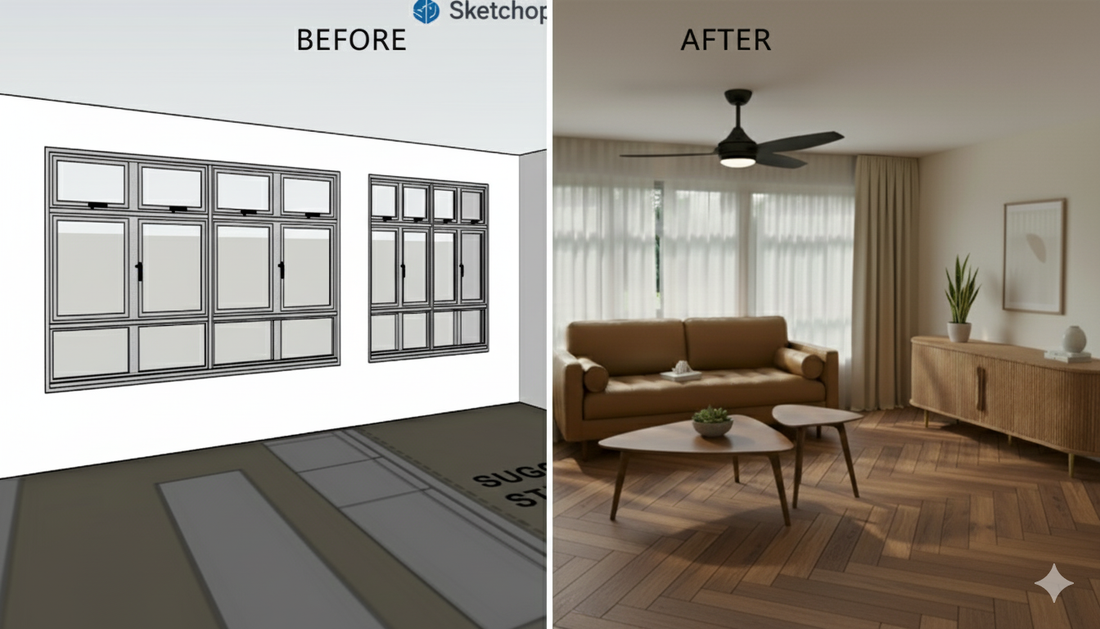
We often get asked, “My BTO model is great, but how can I make it look like a real home?” Today, we're pulling back the curtain on a game-changing process that turns your reliable 3D model into a stunning, photorealistic interior, all with a little help from AI.
It’s easier than you think!
Step 1: The Blueprint (Your Model)
Every amazing design starts with a solid foundation. Your BTO model is that foundation!
- Firstly, go to web SketchUp and load up your model.
- Next, find the perfect camera angle and zoom into the space you wish to render.
- Then, take a clean screenshot of the empty room, making sure to hide the user interface tools.
This screenshot is your "before" image. It gives the AI the correct layout, perspective, and window placement to work with.

Step 2: The First Touch of AI
Now for the magic! We'll use AI to add light, shadow, and a realistic feel to your empty room.

- Go to gemini.google.com and choose "Create images".
- Next, click the "+" icon to upload the screenshot you took in Step 1.
- Then, type a prompt for the AI to generate a photorealistic image from your screenshot. You can start with a simple prompt like this to get the ball rolling:
"Generate a photo realistic home interior with natural lighting and shadow, show a green and lush park outside the window."

Step 3: Curtains and Ambiance
Now let's build on the image. We'll add curtains to soften the space and give it a cozier feel.
- Continue from step 2, type another prompt to add curtains with a translucent shade:
"Photo impose curtains with translucent shades to the windows."
This is how you can progressively build on your design ideas, adding new elements to the image step by step.

Step 4: Add Specific Furniture with a Prompt
From here, you can also add furniture of specific design.

- Upload a picture of a sofa you like.
- Write a prompt like this to add the sofa to your image:
"Refer to the image of the sofa and photo impose it in the middle of the apartment"

Step 5: The Final Touches
Rinse and repeat! Continue working your way progressively towards a fully decorated, photorealistic image. Keep adding more details, from the flooring and decor to the colour scheme and artwork.
Now you have a step-by-step guide on how to turn your BTO model into a photorealistic dream home!


